BackstopJS : Open Source Visual Regression Testing of your Responsive Web
Posted in Recipe on September 19, 2022 by Venkatesh S ‐ 4 min read
Why BackstopJS?
It’s a challenging task to make sure that your application is visually looking perfect on multiple browsers and layouts. It’s a great practice to use the responsive layouts and UI. However it also requires us to visually test how the UI would look on the screen. Lot of time is spent to manually verify this responsiveness, while it can be easily automated using backstopjs.
All you need to know is just 3 commands. Only 3 commands.
BackstopJS Features
Here are some the few key features available in backstopjs that helps us to perform visual regression.
Excellent Reporting, It consists of layout settings for print and screen, scenario display filtering , reference, test, visual diff inspector, a very cool scrubber, options to approving a test.
Simple integration with docker.
Reports that both HTML and CLI based.
You can always simulate user interactions with Playwright or Puppeteer scripts.
JUnit reports can be generated. Further the same reports can be integrated as a part of your CI / CD process.
You have all the freedom to run it locally as a standalone package, globally as a package app, or as a part of CI/CD.
No non-sense easy to use. All you need to know is 3 commands and you are ready to go!
Installation Process
Its available as an npm package. Use the command below to install the tool.
npm install -g backstopjs
BackstopJS workflow
backstop init - setup the backstopjs. You will have to enter the URL, cookies, specify screen sizes etc.
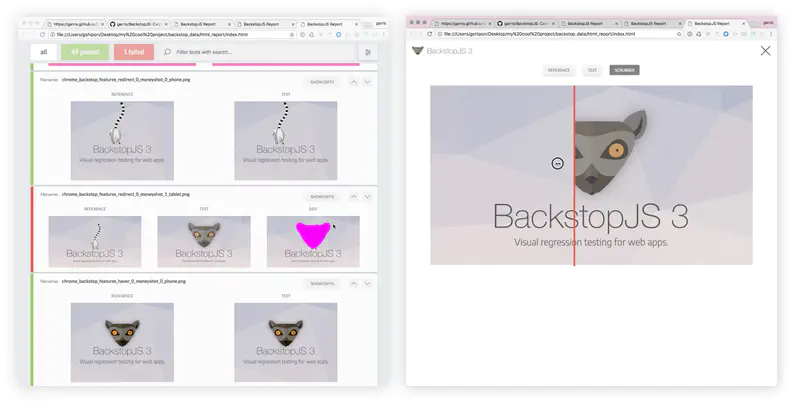
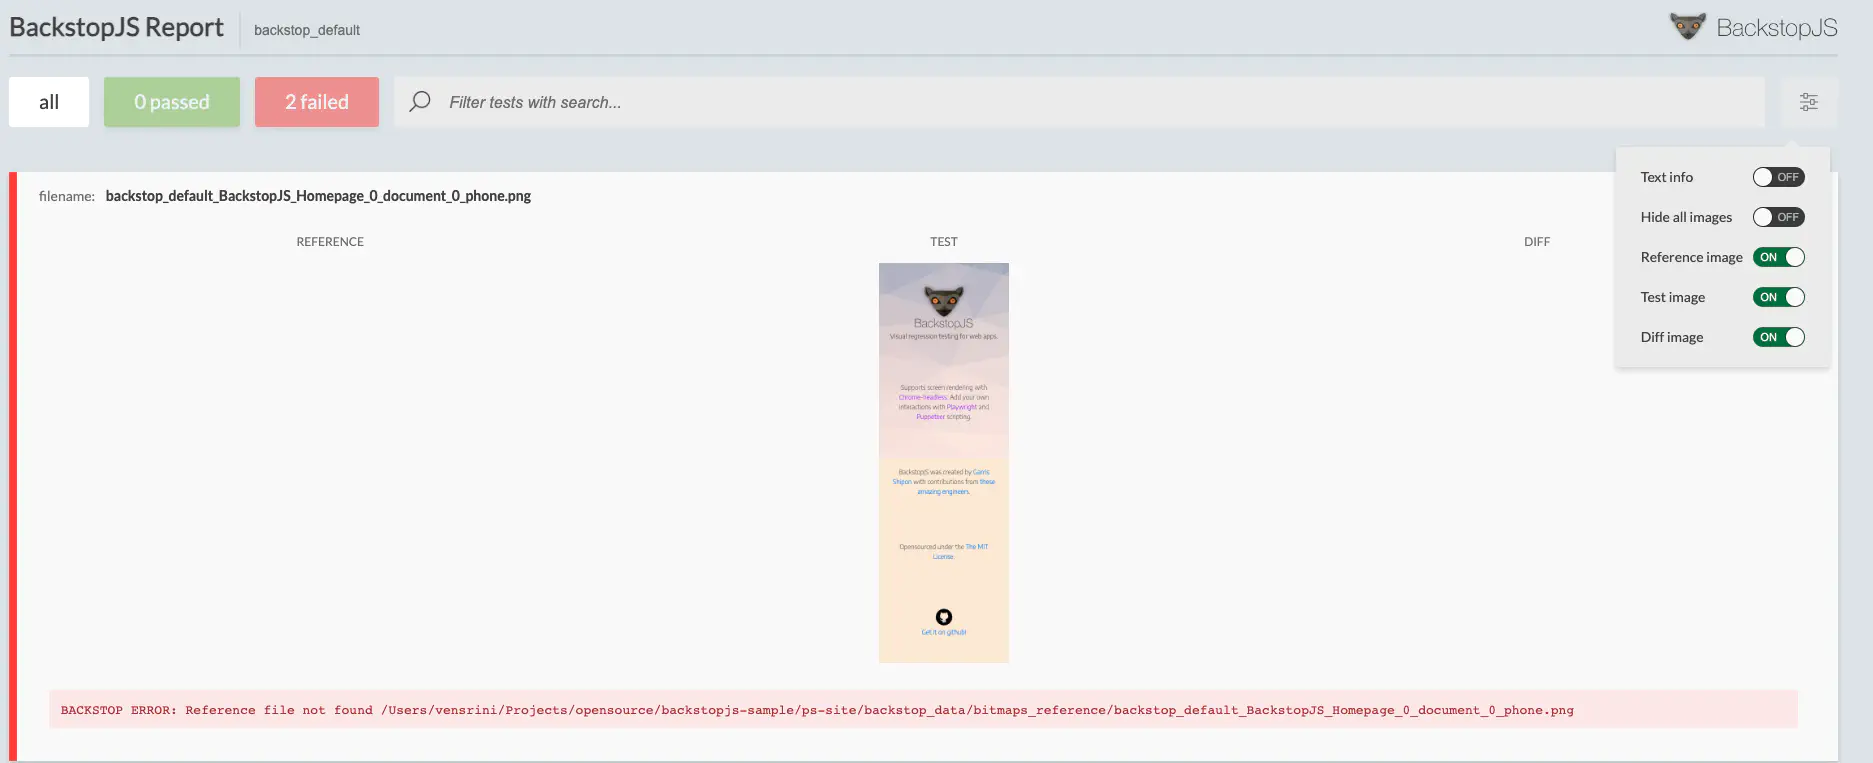
backstop test - Backstop creates a sets of test screens and it compares it with the previous runs if its already run before, highlights if there are any differences between the runs. Shows you a nice visual report.
backstop approve - If all your tests are looking good, approve the current visual tests. Now this will be the reference copy that will be used for your next visual testing. Future tests are compared against your most recent approved test screenshots.
Creating a new Project
Use the following command.
backstop init
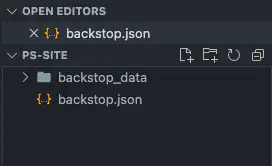
It will create a folder called backstop_data and backstop.json file.
You will have to edit the backstop.json file as per your needs. Check out the reference documentation for what all are possible. This is a very simple process and the json is straight forward.
{
  "id": "backstop_default",
  "viewports": [
    {
      "label": "phone",
      "width": 320,
      "height": 480
    },
    {
      "label": "tablet",
      "width": 1024,
      "height": 768
    }
  ],
  "onBeforeScript": "puppet/onBefore.js",
  "onReadyScript": "puppet/onReady.js",
  "scenarios": [
    {
      "label": "BackstopJS Homepage",
      "cookiePath": "backstop_data/engine_scripts/cookies.json",
      "url": "https://garris.github.io/BackstopJS/",
      "referenceUrl": "",
      "readyEvent": "",
      "readySelector": "",
      "delay": 0,
      "hideSelectors": [],
      "removeSelectors": [],
      "hoverSelector": "",
      "clickSelector": "",
      "postInteractionWait": 0,
      "selectors": [],
      "selectorExpansion": true,
      "expect": 0,
      "misMatchThreshold" : 0.1,
      "requireSameDimensions": true
    }
  ],
  "paths": {
    "bitmaps_reference": "backstop_data/bitmaps_reference",
    "bitmaps_test": "backstop_data/bitmaps_test",
    "engine_scripts": "backstop_data/engine_scripts",
    "html_report": "backstop_data/html_report",
    "ci_report": "backstop_data/ci_report"
  },
  "report": ["browser"],
  "engine": "puppeteer",
  "engineOptions": {
    "args": ["--no-sandbox"]
  },
  "asyncCaptureLimit": 5,
  "asyncCompareLimit": 50,
  "debug": false,
  "debugWindow": false
}
Viewports are one time setup and later you can keep adding scenarios and testing your application. Also note that you can run your automation tests too using Playwright or Puppeteer scripts.
Running tests
Use the following command.
backstop test
Note that your first test will fail, since it does not have any reference to compare and make it pass.
Creating references
Now let’s create a reference, so that next time we run the test, we will be able to compare it against a reference.
Use the following command.
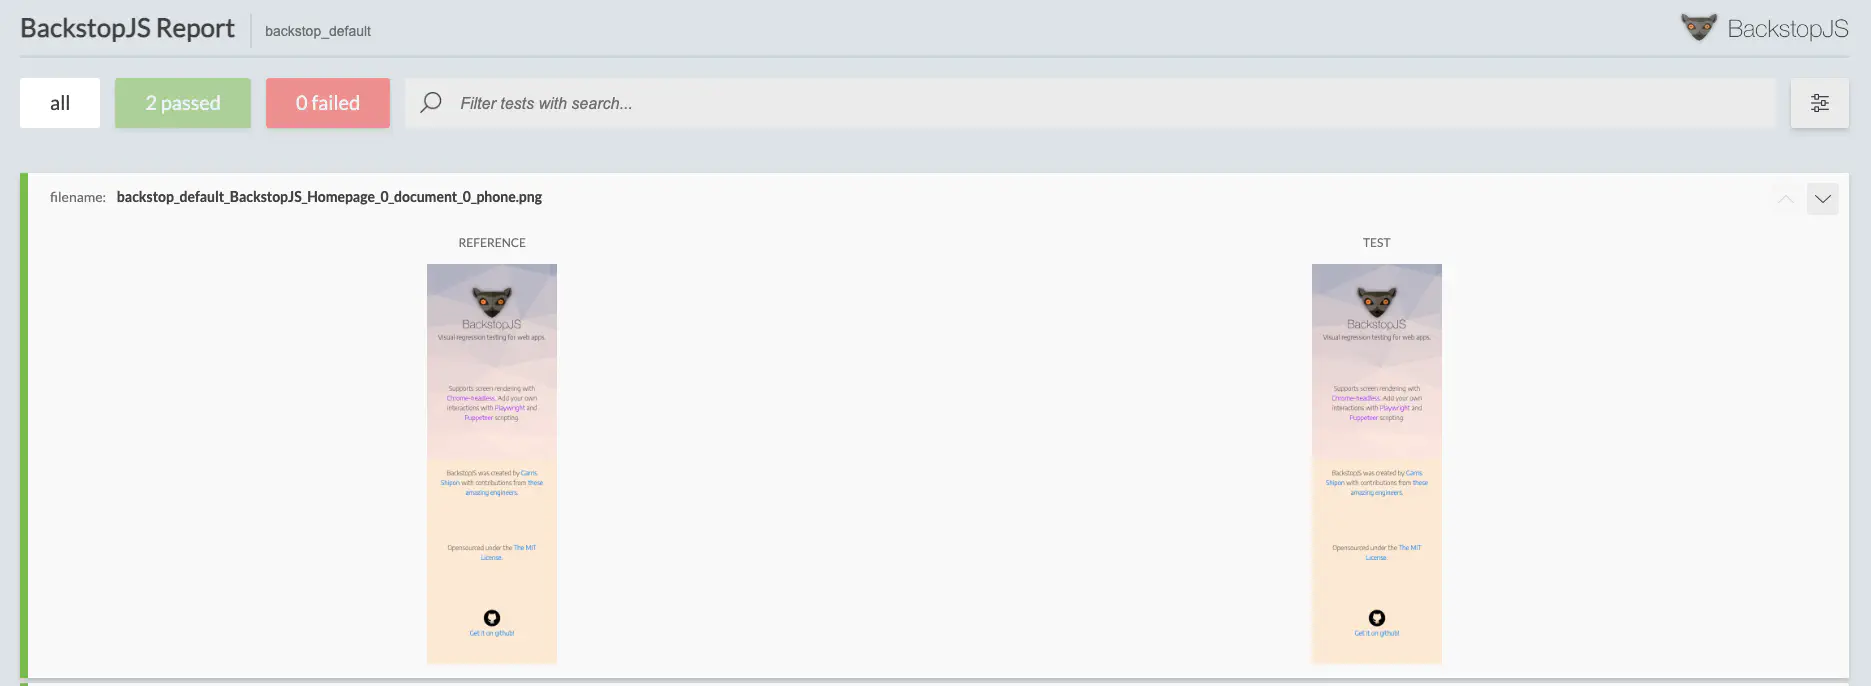
backstop approve
Now lets rerun the tests. Here is how the output will look now.
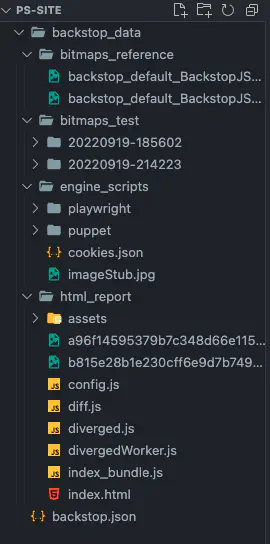
You can also observe the data related to multiple runs in the backstop_data folder as follows.
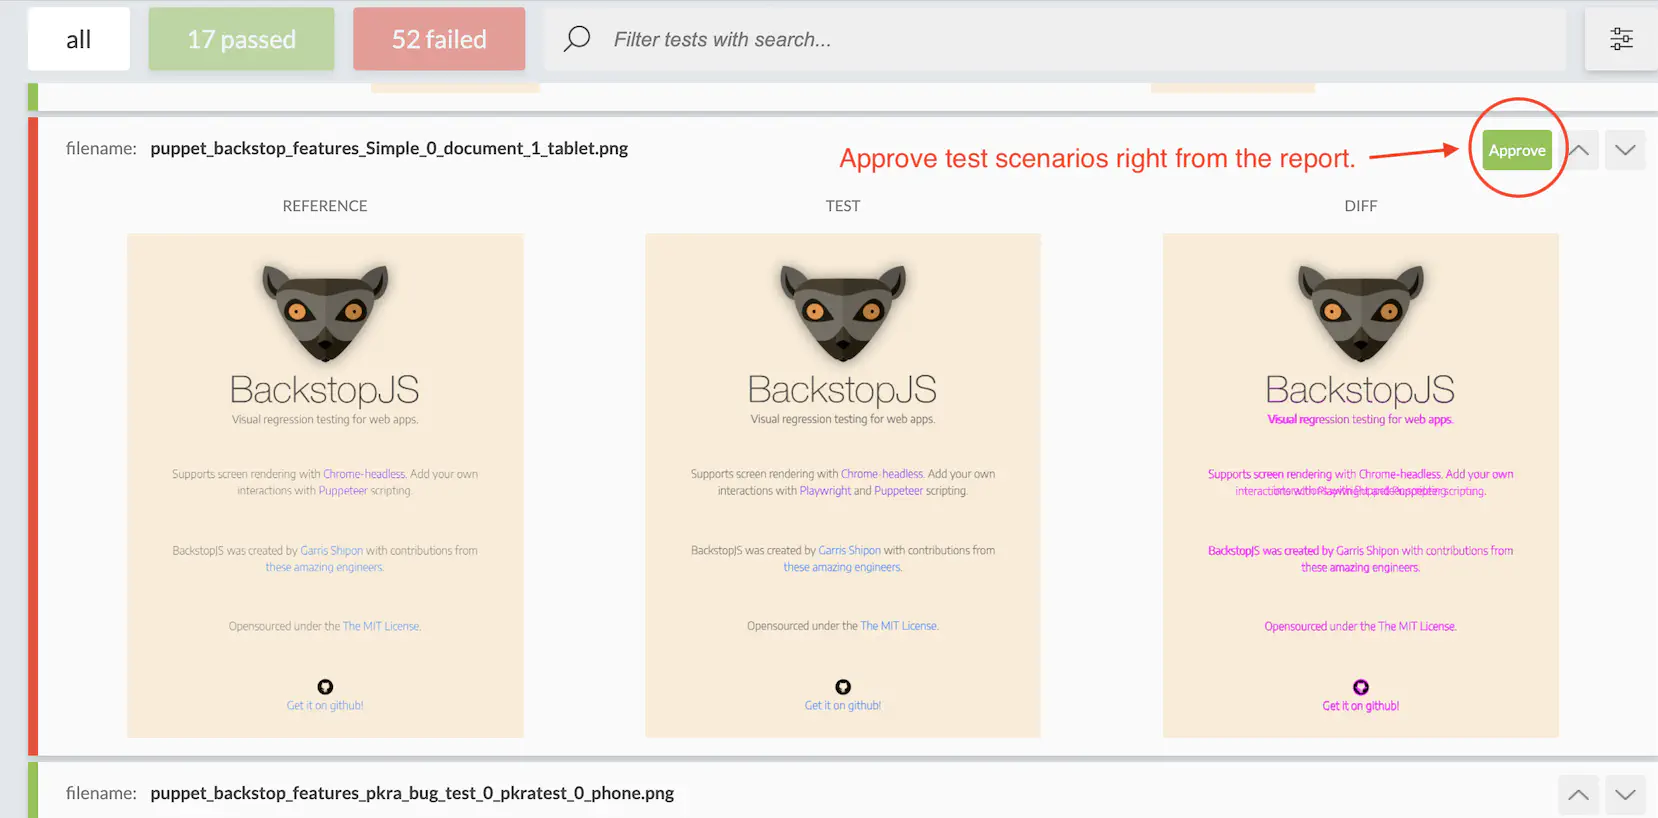
If you have multiple runs, then you have an option to approve any of the runs as your reference screen as shown below from the UI itself. Also notice that the differences between the runs are highlighted in a different color.
Checking out the differences
You can also see that different environments can render the same webpage in slightly different ways in particular with multiple OS and browsers. In the below example you can see the text is rendered slightly differently between Linux and Mac.
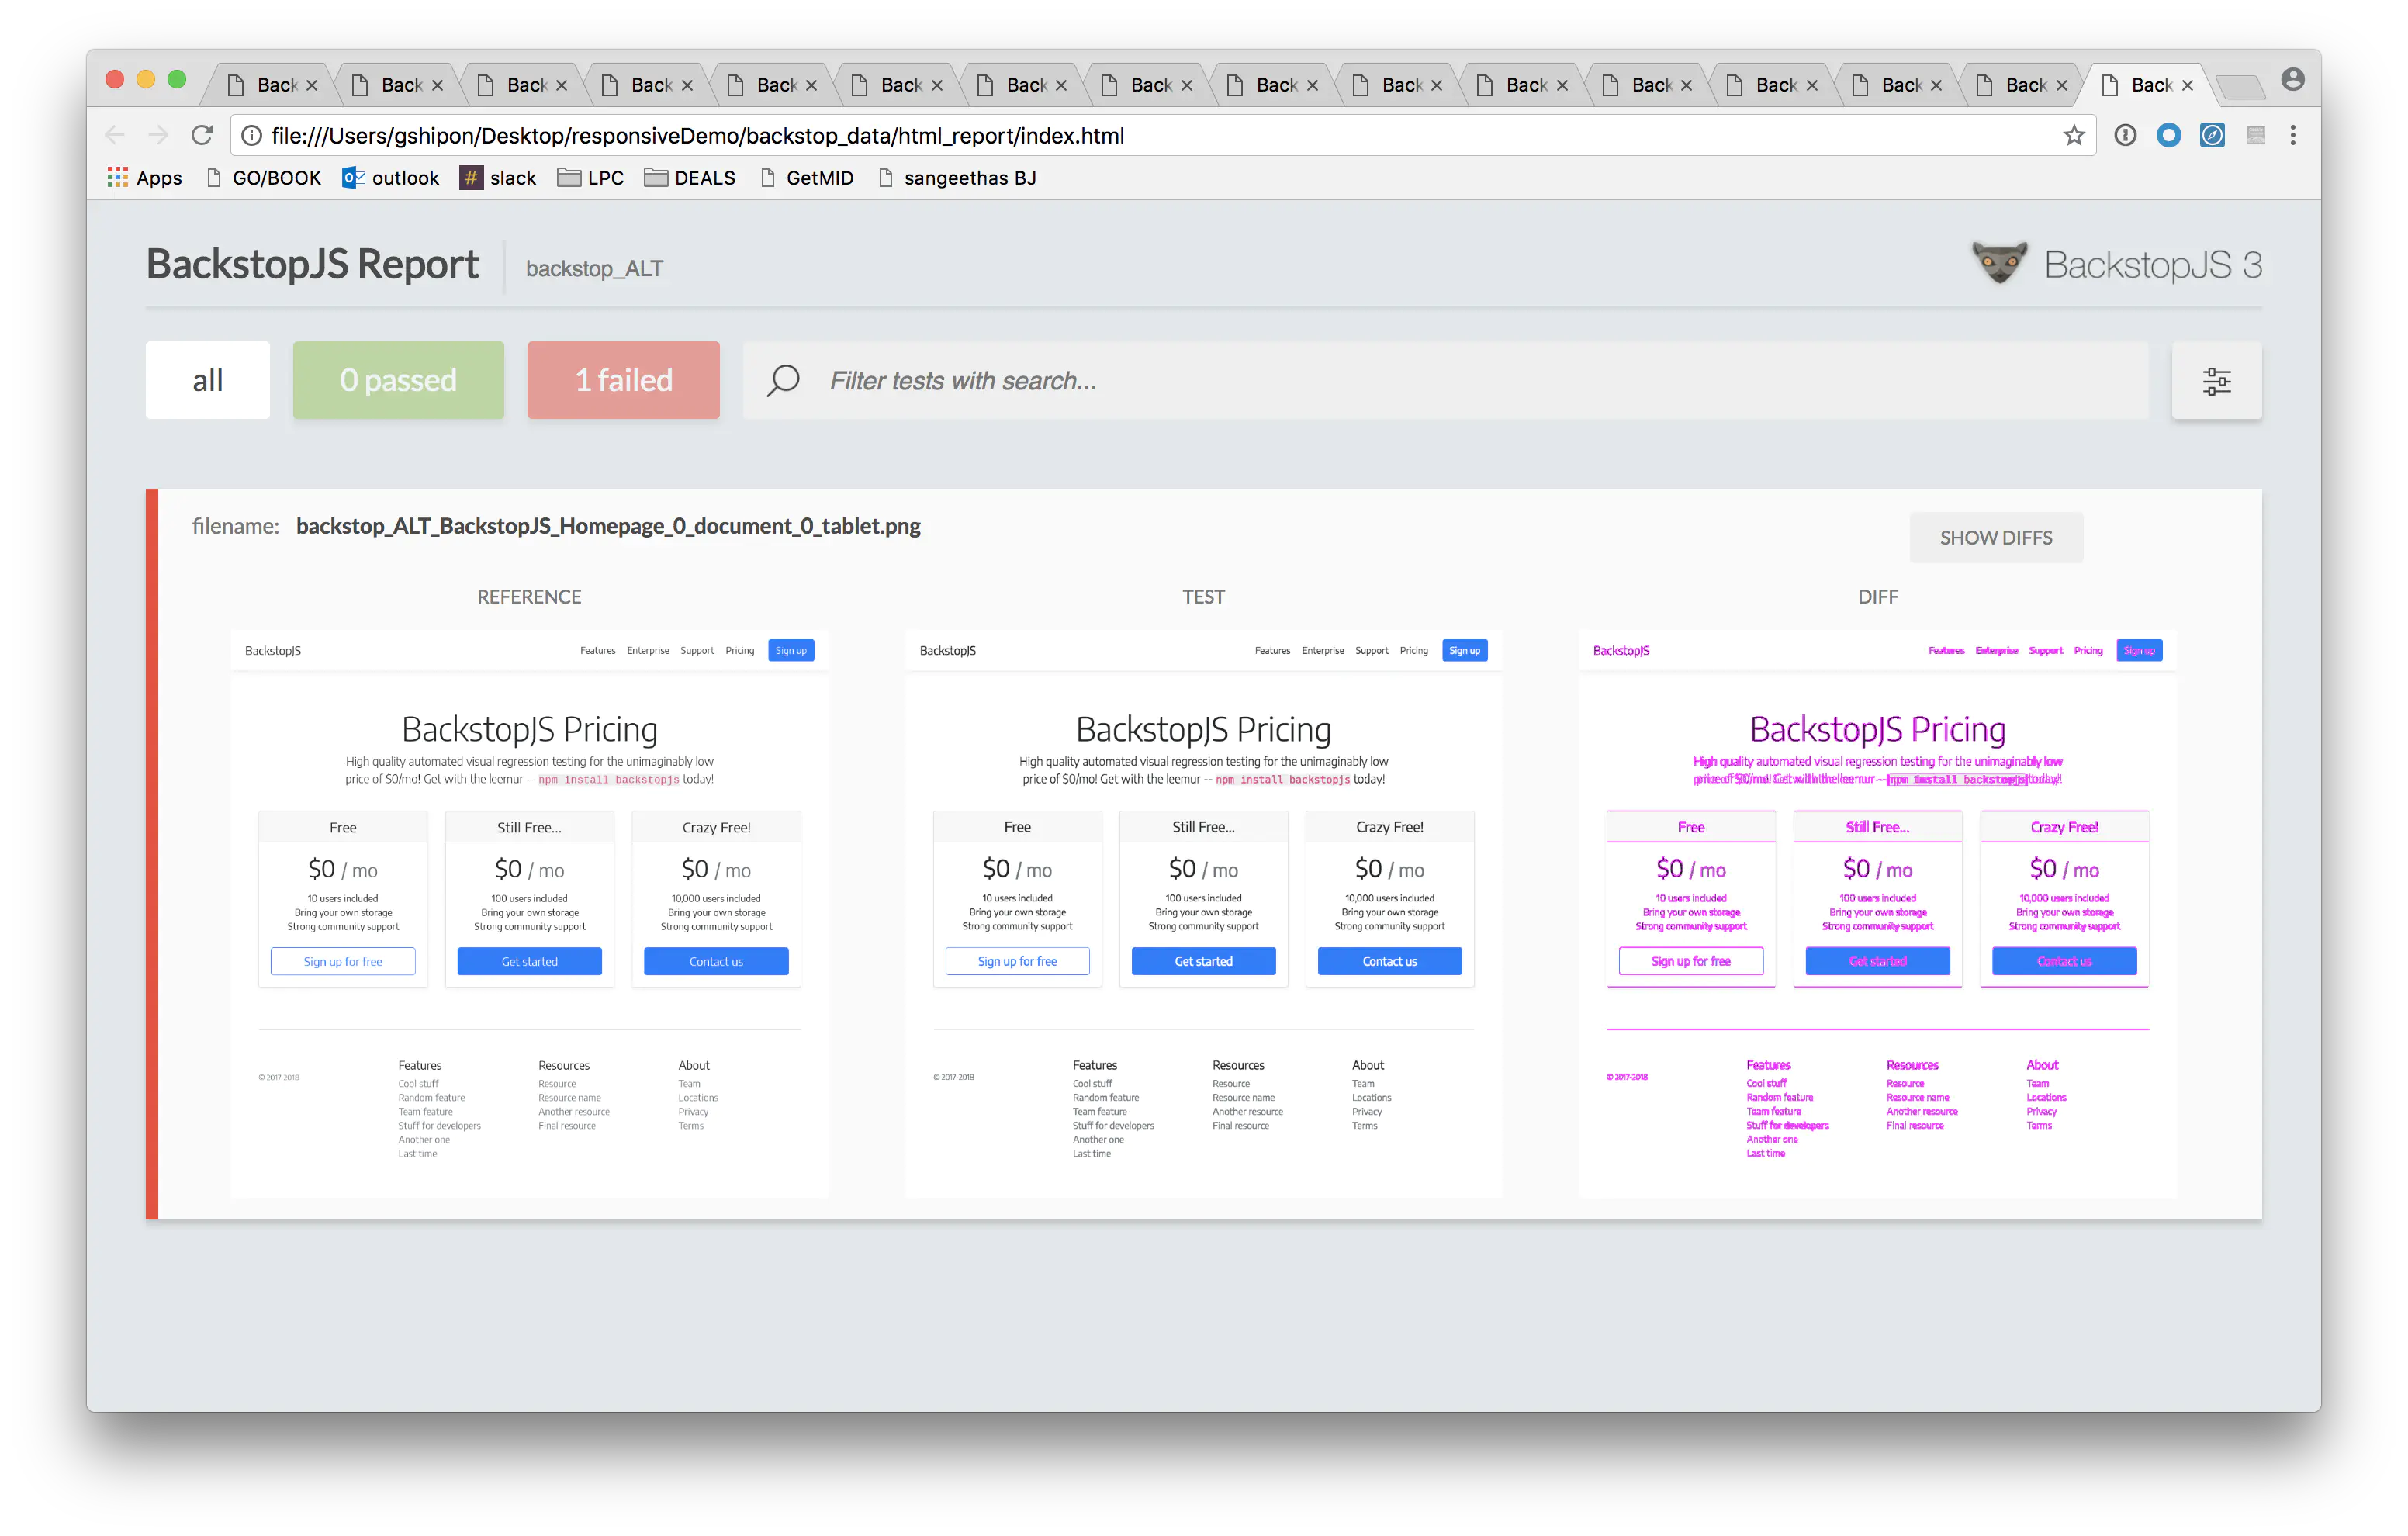
You can notice that the changes are highlighted in a separate color and tests are marked as failed unless you approve them to pass.
Paid Alternative
I have used a tool called “Percy”, which is a paid tool that provides a platform for end to end visual review. It’s a very popular tool and provides all that is required for engineers to perform end to end visual reviews which covers pixel to pixel diffs, responsive diffs and snapshot stabilization. It also provides a seemless workflow for managing the entire lifecycle of the visual review. You can check out the same if you want to use a paid solution that provides everything as a packaged solution.